티스토리 뷰
먼저 테스트는 버거킹 사이트를 사용했습니다.
필요한 정보는 메뉴의 이름, 메뉴 이미지 주소입니다.
1. build.gradle에 의존성 추가
https://mvnrepository.com/에서 selenium-java를 찾아서 받으셔도 됩니다.
implementation group: 'org.seleniumhq.selenium', name: 'selenium-java', version: '4.8.0'
2. 크롬 드라이버 다운로드
사용할 브라우저에 맞춰 받으면 됩니다.
아래 링크에서 확인하실 수 있습니다.
https://www.selenium.dev/downloads/
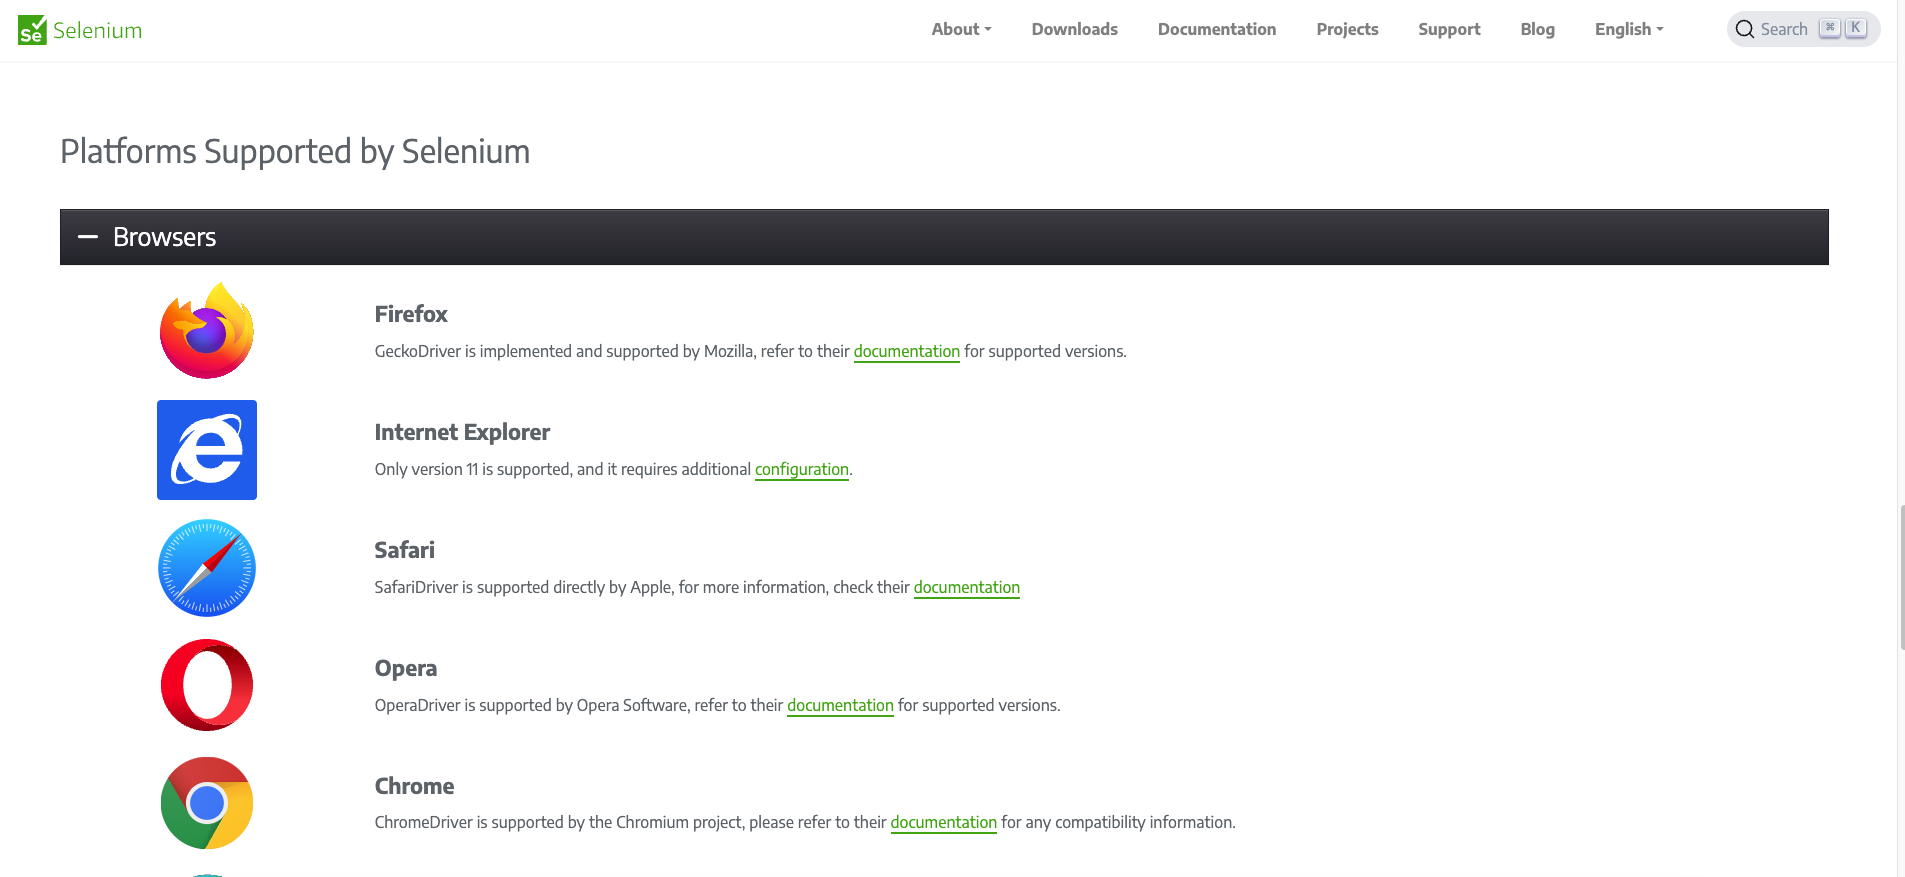
저는 크롬을 사용할 예정이라, 크롬 기준으로 진행하겠습니다.
먼저 크롬의 버전을 확인합니다.


아래 링크에서 크롬 버전에 맞는 드라이버를 다운받습니다.
https://chromedriver.chromium.org/
ChromeDriver - WebDriver for Chrome
WebDriver is an open source tool for automated testing of webapps across many browsers. It provides capabilities for navigating to web pages, user input, JavaScript execution, and more. ChromeDriver is a standalone server that implements the W3C WebDriver
chromedriver.chromium.org
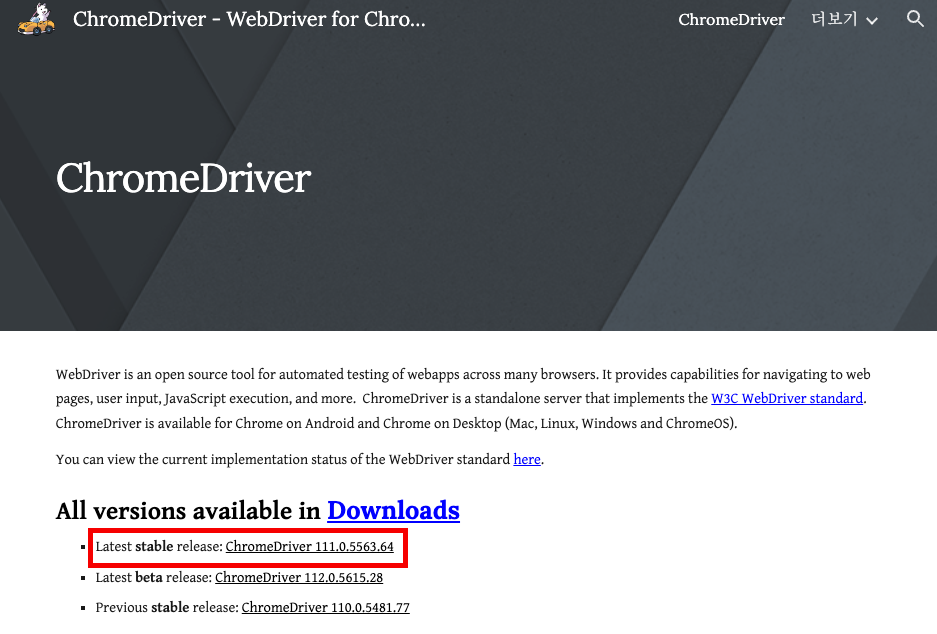
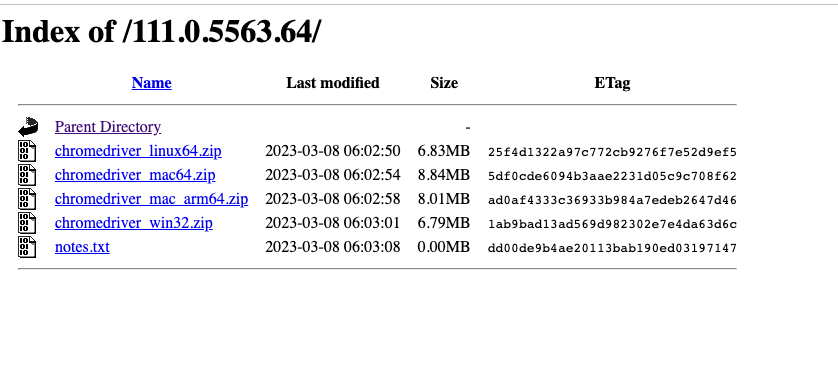
드라이버를 받아논 경로를 기억해두고 다음 단계로 넘어갑니다.
4.코드 작성
먼저 버거킹 홈페이지에 접속했을때 메뉴가 보여지도록 해 줘야되는 동작들이 있습니다.
네비게이션바에서 '메뉴소개' -> '와퍼&주니어' 순으로 클릭해야 합니다.
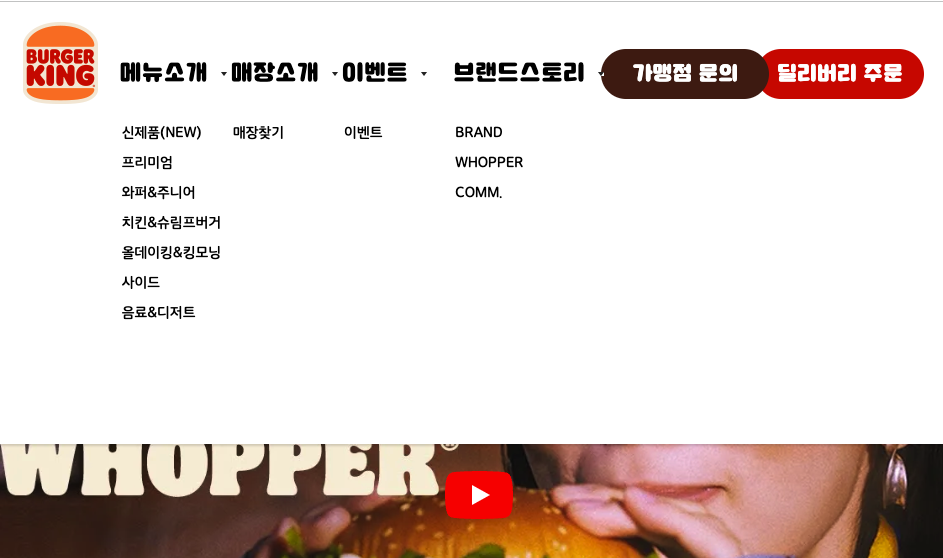
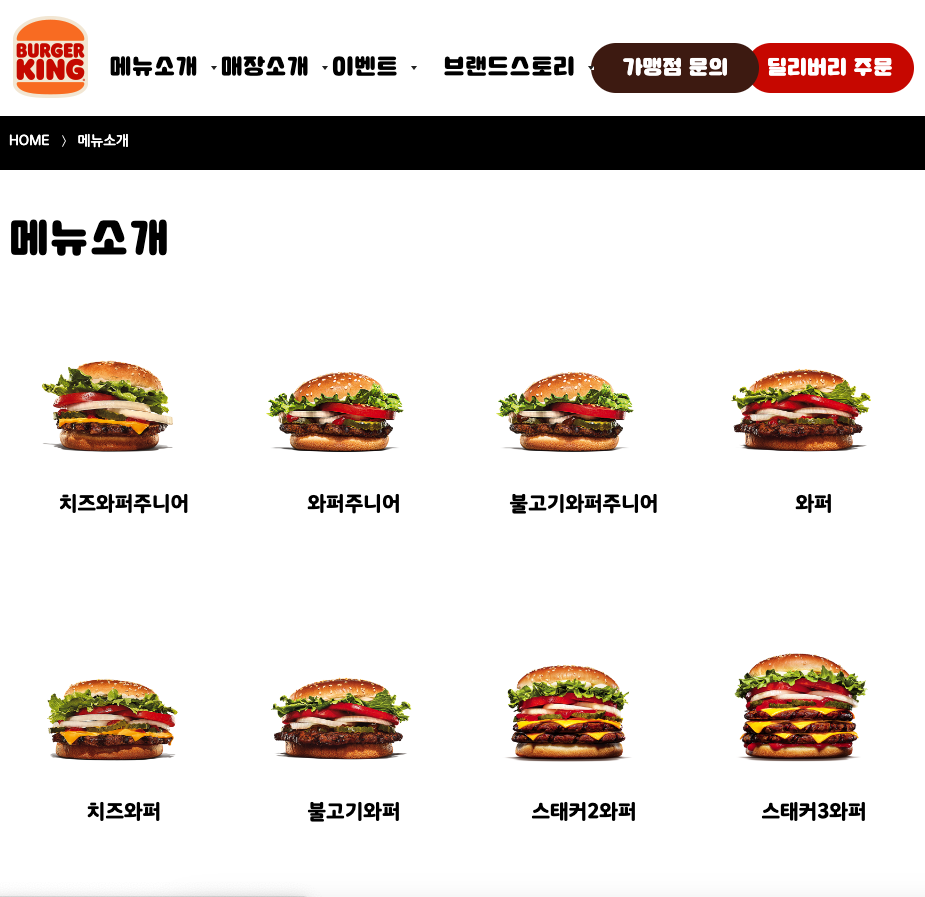
그리고 그 이후에는 어떤 것들을 크롤링 하면 될지를 살펴봅니다.
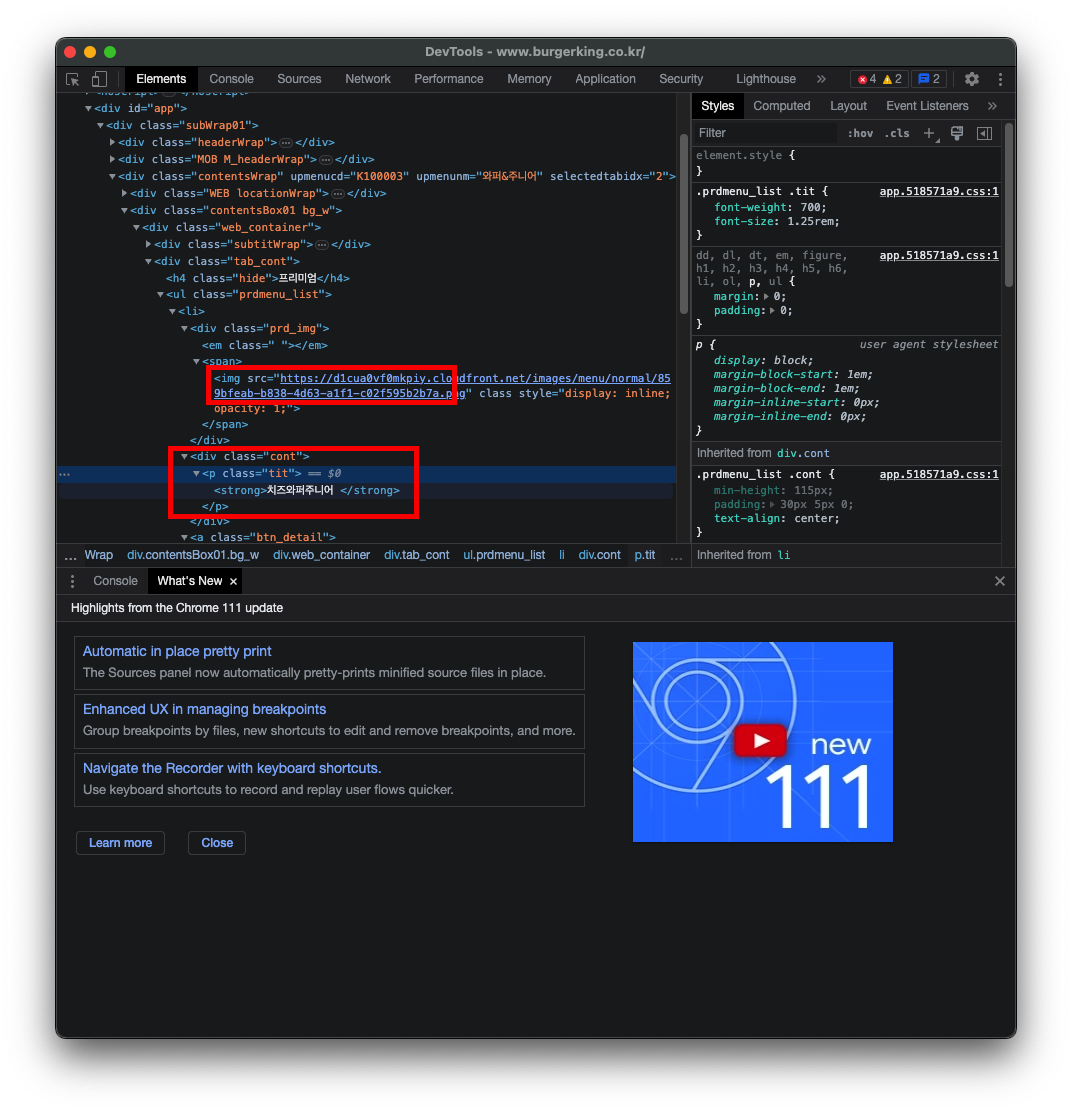
일단 텍스트는 얼핏 보니 cont라는 클래스를 가져오면 될 것 같고, 이미지는 img태그를 찾고 거기에서 src의 attribute를 찾아오면 되지 않을까 싶습니다.
이 구조를 제대로 파악할 수는 없으니 일단 이렇게 해 보겠습니다.
전 아래와 같이 코드를 작성하고, 특정 uri로 get요청을 보내면 crawling.process()가 실행되도록 했습니다.
package ourminiprojects.mykiosk.menu;

import org.jsoup.Connection;
import org.jsoup.Jsoup;
import org.jsoup.nodes.Document;
import org.jsoup.nodes.Element;
import org.jsoup.select.Elements;
import org.openqa.selenium.By;
import org.openqa.selenium.WebDriver;
import org.openqa.selenium.WebElement;
import org.openqa.selenium.chrome.ChromeDriver;
import org.openqa.selenium.chrome.ChromeOptions;
import org.springframework.stereotype.Component;

import java.io.IOException;
import java.util.ArrayList;
import java.util.List;

@Component //api 호출할 때 필요해서
public class Crawling {
    private WebDriver driver;

	//크롤링 하려는 페이지 주소를 작성합니다
    private static final String url = "https://www.burgerking.co.kr/#/home";

    public void process() {
    	//크롬 드라이버 위치를 추가해 줍니다
        System.setProperty("webdriver.chrome.driver", "chromedriver파일의 경로를 여기에 입력해 주세요");

        //크롬 버전이 111인 경우 사용합니다. 이 설정이 없을 경우 403 에러가 나오는 이슈가 있습니다.
		//버전이 111 이전 버전인 경우에는 무관합니다.
        ChromeOptions options = new ChromeOptions();
        options.addArguments("--remote-allow-origins=*");

        //위의 옵션이 필요하지 않은 경우 driver = new ChromeDriver() 이렇게 쓰시면 됩니다.
        driver = new ChromeDriver(options);

        try{
			//크롤링 실행
            getDataList();
        } catch (InterruptedException e) {
            e.printStackTrace();
        }

        driver.close(); //탭 닫기
        driver.quit();	//브라우저 닫기

    }

	//데이터를 가져옵니다
    private void getDataList() throws InterruptedException {

        driver.get(url);
        Thread.sleep(1000);

        // GNBWrap 클래스의 메뉴소개 버튼을 클릭합니다.
        WebElement menuButton = driver.findElement(By.cssSelector(".GNBWrap > ul > li:first-child > button"));
        menuButton.click();
        Thread.sleep(1000); // 1초 대기

        // 신제품(NEW)을 클릭합니다.
        WebElement newProductButton = driver.findElement(By.cssSelector(".GNBWrap > ul > li:first-child > ul > li:nth-child(3) > a"));
        newProductButton.click();
        Thread.sleep(1000); // 1초 대기

        List<WebElement> elements = driver.findElements(By.cssSelector(".cont"));

        for (WebElement element : elements) {

            System.out.println(element.getText());
        }

        List<WebElement> imgElements = driver.findElements(By.tagName("img"));

        for (WebElement imgElement : imgElements) {
            //base64로 인코딩 된 게 나와서 그거 없애주려고
            if (imgElement.getAttribute("src").contains("data:image/png;base64")) {
                continue;
            }
            String srcValue = imgElement.getAttribute("src");
            System.out.println("src value: " + srcValue);


		}
    }
}
코드는 일단 튜토리얼들을 봐가면서 작성하였습니다.
먼저 저는 element를 찾을때 cssSelector를 사용하였습니다.
이 뿐만 아니라 class나 name, tag 등으로도 찾을 수 있습니다. 관련 내용 확인하실 수 있는 링크 아래 첨부드립니다.
https://www.selenium.dev/documentation/webdriver/elements/finders/#find-elements-from-element
Finding web elements
Locating the elements based on the provided locator values.
www.selenium.dev
https://www.selenium.dev/documentation/webdriver/getting_started/
Getting started
If you are new to Selenium, we have a few resources that can help you get up to speed right away.
www.selenium.dev
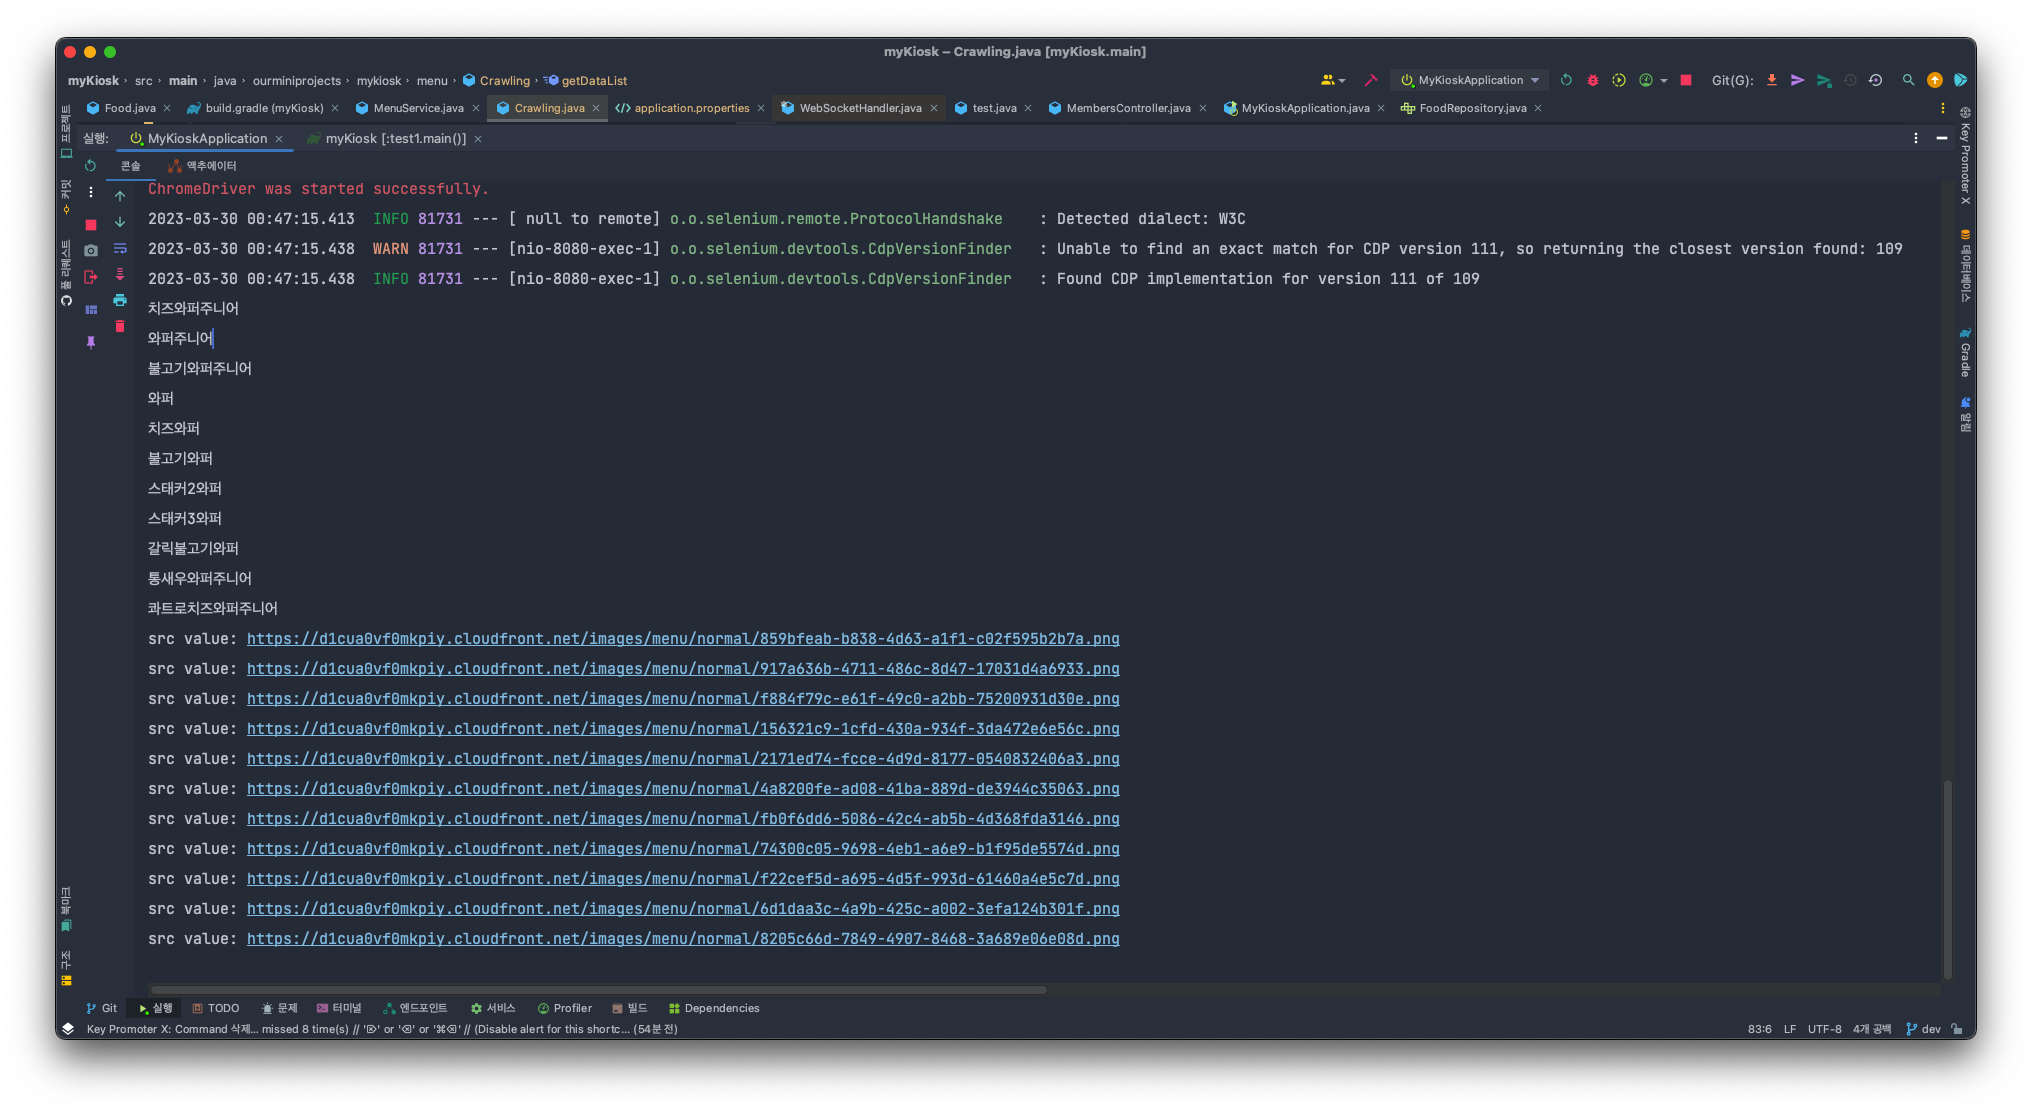
이제 스프링부트를 실행시키고 포스트맨을 이용해 get요청을 보내봤습니다.
운이 좋게도 바로 아래와 같이 원하는 값을 가져올 수 있었습니다.
(img도 다른 게 섞여있지 않아서 다행이었습니다. 귀찮아서 그냥 img태그 한 번 다 가져와 봤는데 base64로 인코딩된 하나 말곤 다 제대로 넘어와서 그것만 안나오게 대충 처리해 두었습니다.)
'spring' 카테고리의 다른 글
| 어떤 lock을 사용할까 - redisson / pessimistic lock (0) | 2023.02.23 |
|---|---|
| [spring security] failed to load resource: the server responded with a status of 405 (0) | 2023.02.04 |
| 수동으로 등록한 Bean과 자동으로 등록한 Bean 이름이 겹치면? (0) | 2023.01.10 |
| @Nested 테스트코드를 더 보기 쉽게 (0) | 2023.01.07 |
| UnsatisfiedDependencyException 의존성 추가하지 않았을 때 발생 (0) | 2023.01.06 |
- Total
- Today
- Yesterday
- CheckedException
- bankersRounding
- 항해
- jmeter로그인
- jmeter테스트
- 인덱스
- Python
- jmeter쿠키
- pessimisticlock
- EC2
- jmeter시나리오
- 동적크롤링
- 대규모더미데이터
- 스프링faker
- 프로그래머스
- CorrectnessAndTheLoopInvariant
- jwt
- Lock
- Redisson
- 자바
- hackerrank
- jmeter세션
- jmeter토큰
- Redis
- Spring
- jmeter부하테스트
- index
- 토큰
- Java
- 부하테스트시나리오
| 일 | 월 | 화 | 수 | 목 | 금 | 토 |
|---|---|---|---|---|---|---|
| 1 | 2 | 3 | ||||
| 4 | 5 | 6 | 7 | 8 | 9 | 10 |
| 11 | 12 | 13 | 14 | 15 | 16 | 17 |
| 18 | 19 | 20 | 21 | 22 | 23 | 24 |
| 25 | 26 | 27 | 28 | 29 | 30 | 31 |
