티스토리 뷰
*이것저것 설치해가면서 하다보니 차이가 있을 수 있습니다.
*작동 확인 후, 진행 순서를 남겼습니다.
*토이 프로젝트 진행을 위해 짧게 공부하고 진행한 내용이라 많이 부족합니다. 제가 챙기지 못한 부분이나 더 알아봐야 할 부분 남겨주시면 감사하겠습니다!!
계정설정
로그인을 통해서 접속하지 않을 것이라 nologin 설정을 해준다고 함.
sudo useradd --no-create-home --shell /usr/sbin/nologin prometheusPrometheus 설치
$ sudo apt-get install -y prometheus prometheus-node-exporter prometheus-pushgateway prometheus-alertmanager*이미 설치한 상태라 로그에 변화가 없습니다.
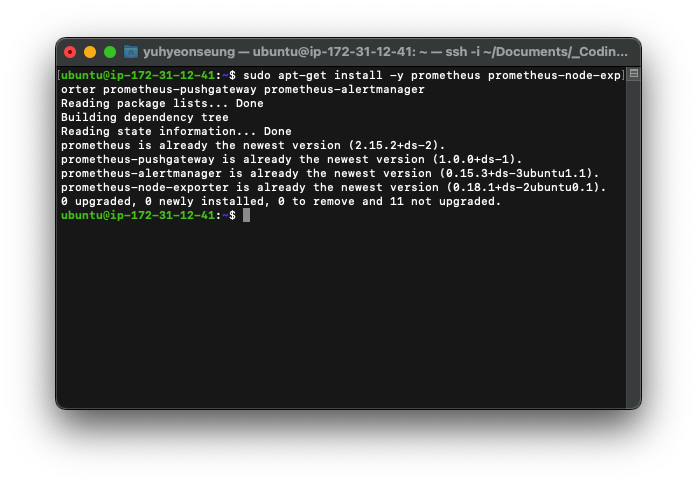
Prometheus 작동 확인
$ sudo systemctl status prometheus.service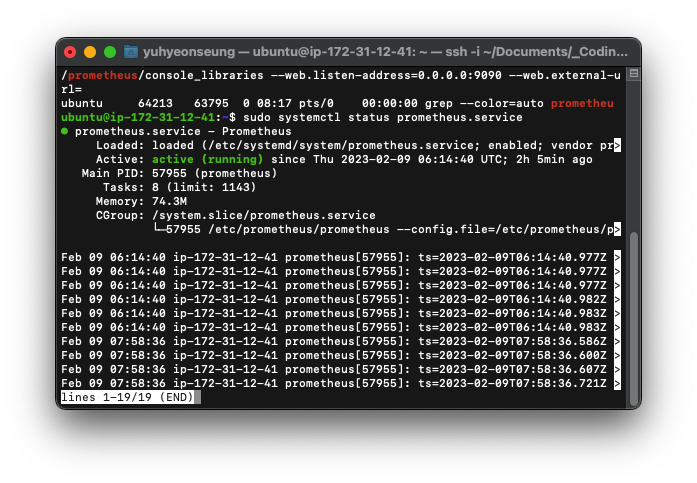
Grafana 설치
$ sudo add-apt-repository "deb https://packages.grafana.com/oss/deb stable main"로그를 보면 아래처럼 NO_PUBKEY 에러가 발생할 수 있다.
Hit:1 http://ap-northeast-1.ec2.archive.ubuntu.com/ubuntu bionic InRelease
Get:2 http://ap-northeast-1.ec2.archive.ubuntu.com/ubuntu bionic-updates InRelease [88.7 kB]
Get:3 http://ap-northeast-1.ec2.archive.ubuntu.com/ubuntu bionic-backports InRelease [74.6 kB]
Get:4 http://security.ubuntu.com/ubuntu bionic-security InRelease [88.7 kB]
Get:5 https://packages.grafana.com/oss/deb stable InRelease [12.1 kB]
Get:6 http://ap-northeast-1.ec2.archive.ubuntu.com/ubuntu bionic-updates/universe amd64 Packages [1025 kB]
Err:5 https://packages.grafana.com/oss/deb stable InRelease
  The following signatures couldn't be verified because the public key is not available: NO_PUBKEY 8C8C34C524098CB6
Reading package lists... Done
W: GPG error: https://packages.grafana.com/oss/deb stable InRelease: The following signatures couldn't be verified because the public key is not available: NO_PUBKEY 8C8C34C524098CB6
E: The repository 'https://packages.grafana.com/oss/deb stable InRelease' is not signed.
N: Updating from such a repository can't be done securely, and is therefore disabled by default.
N: See apt-secure(8) manpage for repository creation and user configuration details.
the following signatures couldn't be verified because the public key is not available: NO_PUBKEY~~~ 에러 해결
1. keyserver.ubuntu.com/ 접속
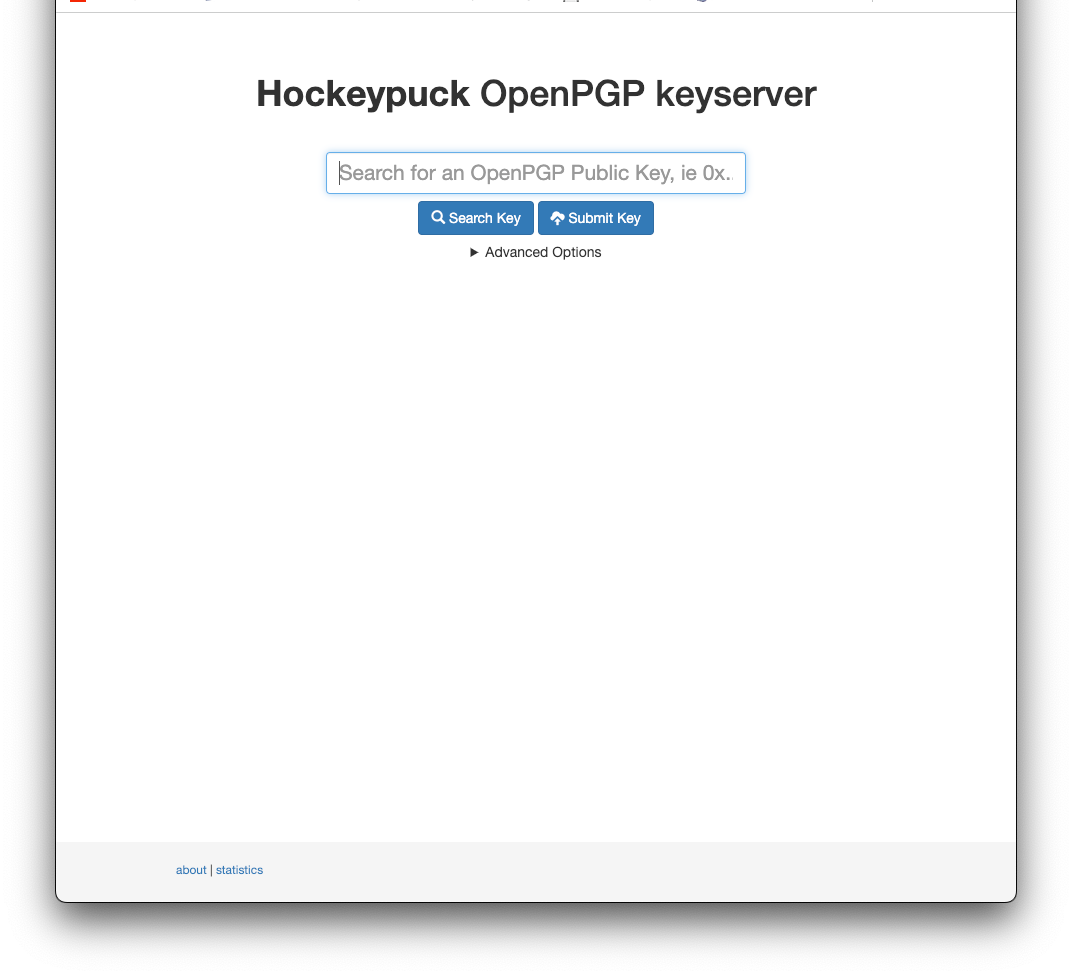
2. 입력창에 NO_PUBKEY라는 단어 뒷부분을 복사해 입력한다.
입력할 때 앞에 0x를 붙여준다.
입력하면 아래와 같은 창이 나오는데, 여기에서 pub 뒷부분의 링크를 클릭하고 전체 복사한다.
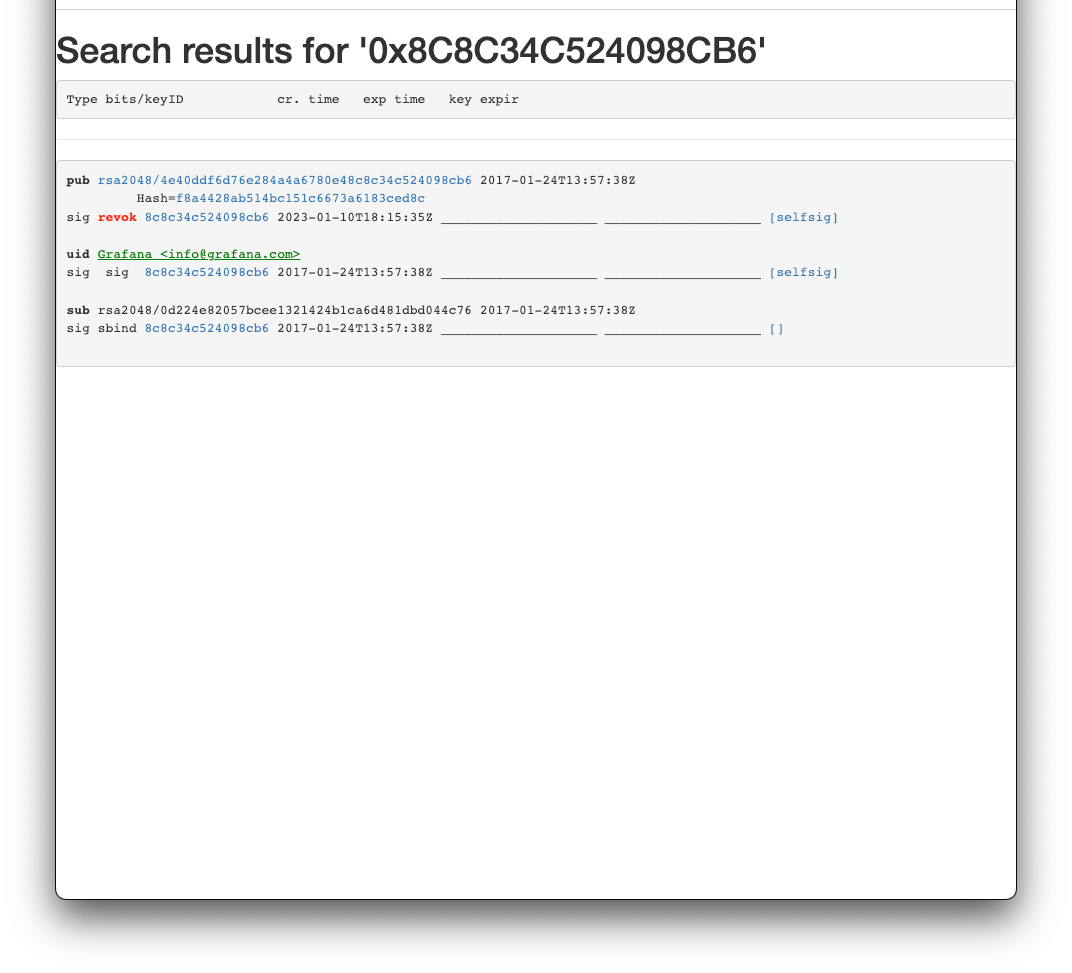
3.txt로 저장. (지금은 맥에서 작성했는데, 실제 작업 할 때에는 ec2에서 파일 생성하고 vi로 작성하였음. 뭐가 되었든 실행만 할 수 있으면!)
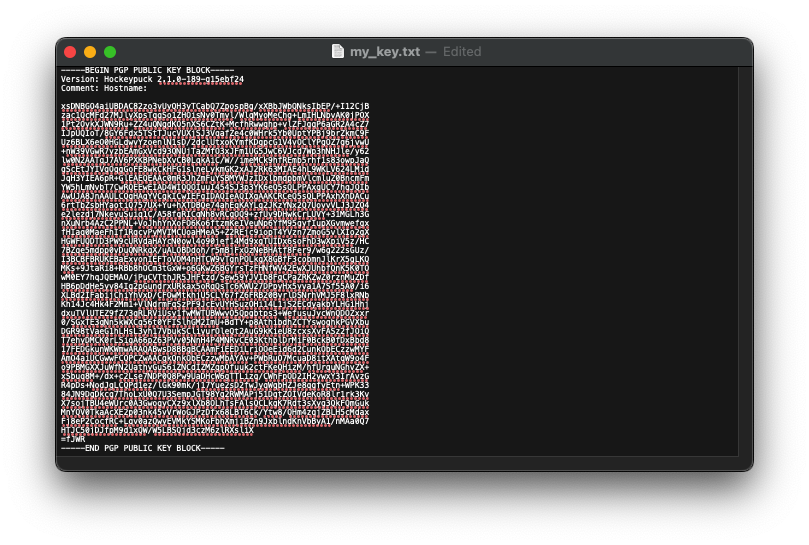
4. 저장된 키 실행
$ sudo apt-key add my-key.txtresponse로 OK가 찍히면 끝
다시 Repository 추가
이런 식으로 나와야함
$ sudo add-apt-repository "deb https://packages.grafana.com/oss/deb stable main"
Hit:1 http://ap-northeast-1.ec2.archive.ubuntu.com/ubuntu bionic InRelease
Hit:2 http://ap-northeast-1.ec2.archive.ubuntu.com/ubuntu bionic-updates InRelease
Hit:3 http://ap-northeast-1.ec2.archive.ubuntu.com/ubuntu bionic-backports InRelease
Hit:4 http://security.ubuntu.com/ubuntu bionic-security InRelease
Get:5 https://packages.grafana.com/oss/deb stable InRelease [12.1 kB]
Get:6 https://packages.grafana.com/oss/deb stable/main amd64 Packages [13.8 kB]
Fetched 13.8 kB in 1s (9670 B/s)
Reading package lists... Done
키 다운로드
$ curl https://packages.grafana.com/gpg.key | sudo apt-key add -
apt설치
$ sudo apt-get install grafana
Grafana 시작
$ sudo systemctl daemon-reload
$ sudo systemctl start grafana-server
$ sudo systemctl enable grafana-server
구동 확인
$ ps -ef | grep grafanagrafana 기본 포트는 3000, 접속 안되면 방화벽 확인, 기본 접속 정보는 admin / admin
Node Exporter 설치
*설정에 대한 정확한 의미나 용도를 확실히 알지 못합니다 ㅠ
*일단 Prometheus가 모니터링할 대상을 지정하기 위해 사용한다고 생각하고 있습니다
*사실 설치 자체는 이미 Prometheus 설치 단계에서 이미 설치된 상태입니다.
/etc/prometheus/prometheus.yml 파일에 추가 세팅.
# Here it's Prometheus itself.
scrape_configs:
  # The job name is added as a label `job=<job_name>` to any timeseries scraped from this config.
  - job_name: 'prometheus'

    # Override the global default and scrape targets from this job every 5 seconds.
    scrape_interval: 5s
    scrape_timeout: 5s

    # metrics_path defaults to '/metrics'
    # scheme defaults to 'http'.

    static_configs:
      - targets: ['localhost:9090']

  - job_name: 'test'
    # If prometheus-node-exporter is installed, grab stats about the local
    # machine by default.
    static_configs:
      - targets: ['localhost:9100']

  - job_name: node
    metrics_path: '/actuator/prometheus' # Application prometheus endpoint
    static_configs:
      - targets: ['사용할 ip:포트'] # Application host:port
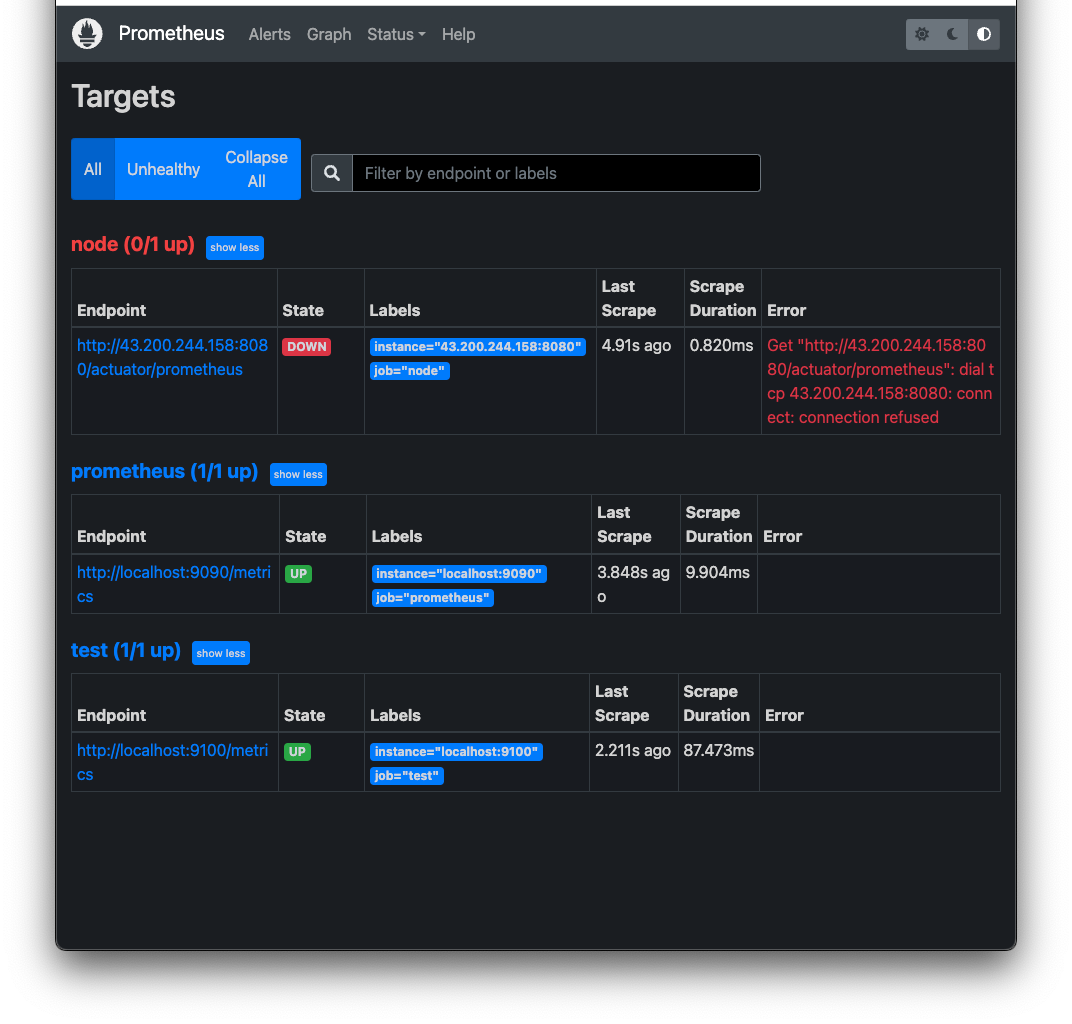
이후 프로메테우스에 들어가보면 이렇게 되어있다.
(node는 스프링부트를 아직 안 띄워놔서 down이라고 나오고 있다.)
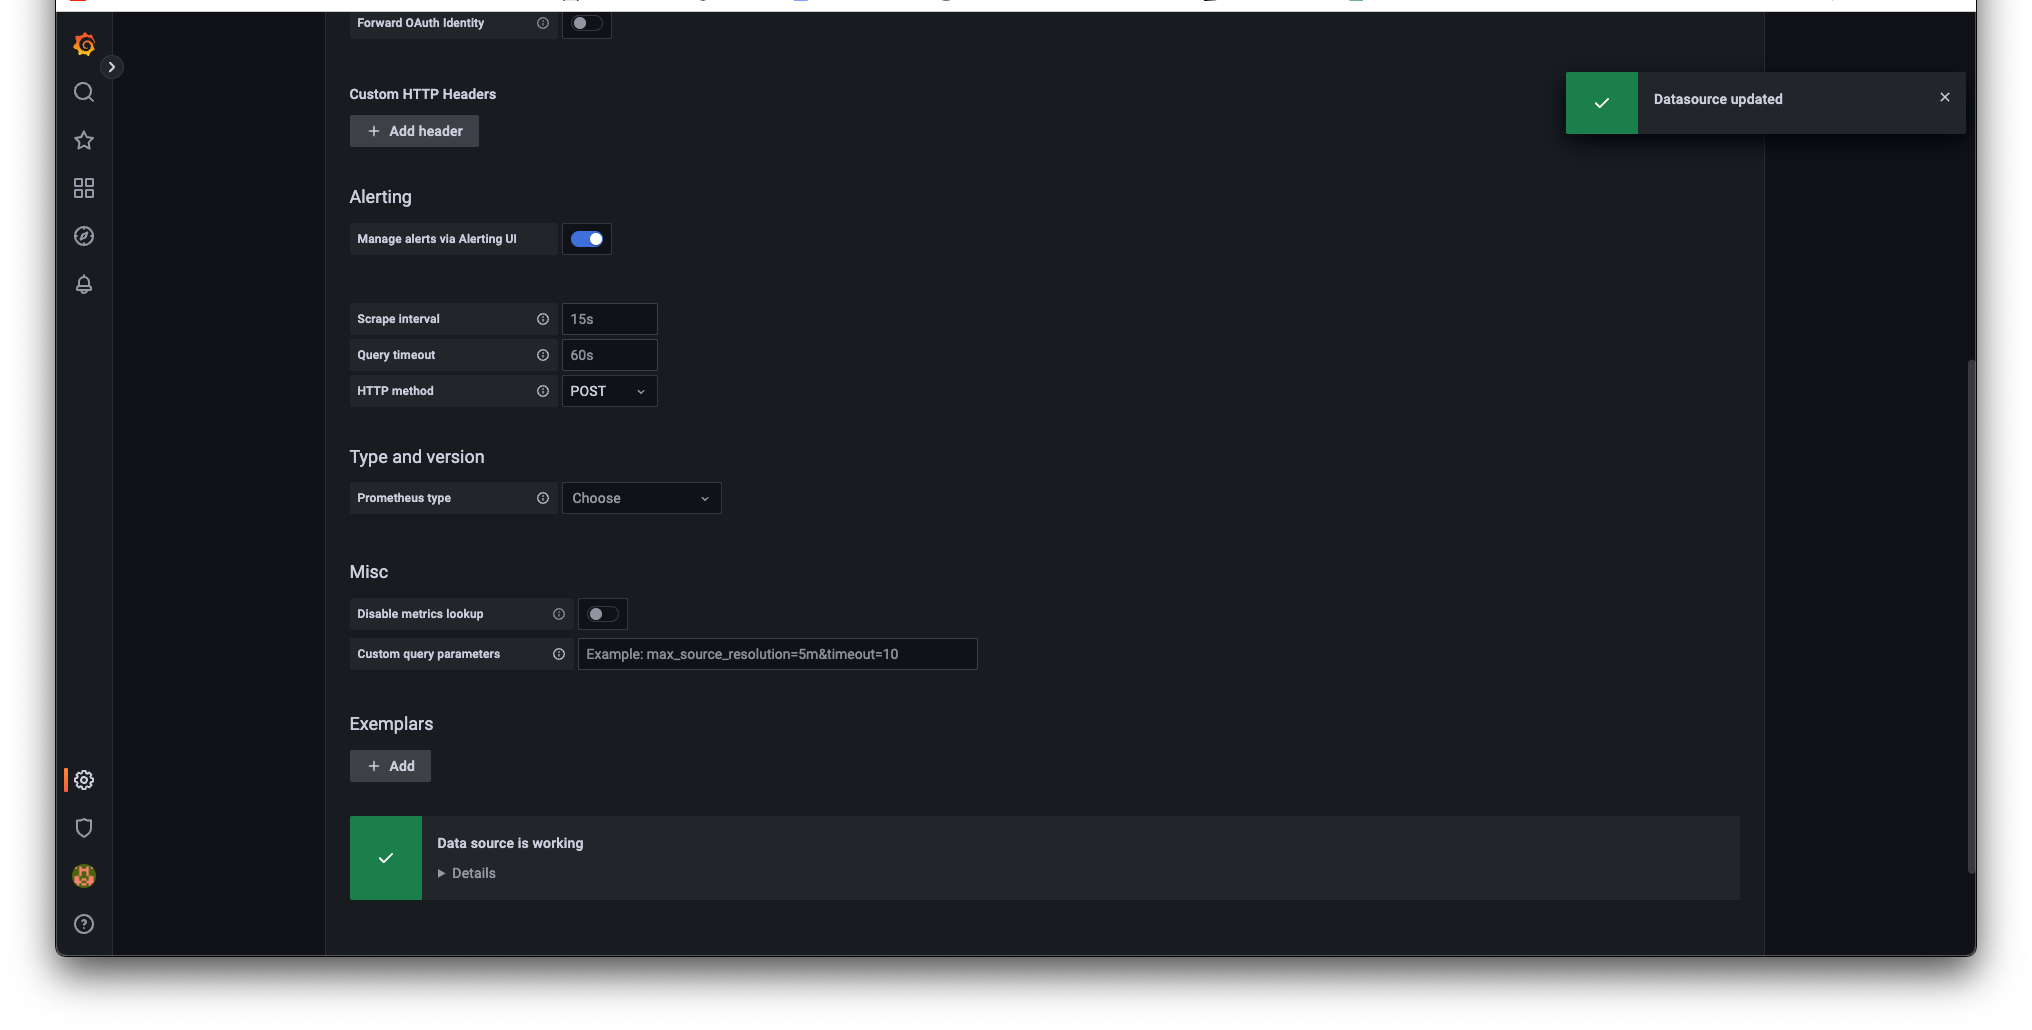
Grafana에서 Prometheus 데이터 보기
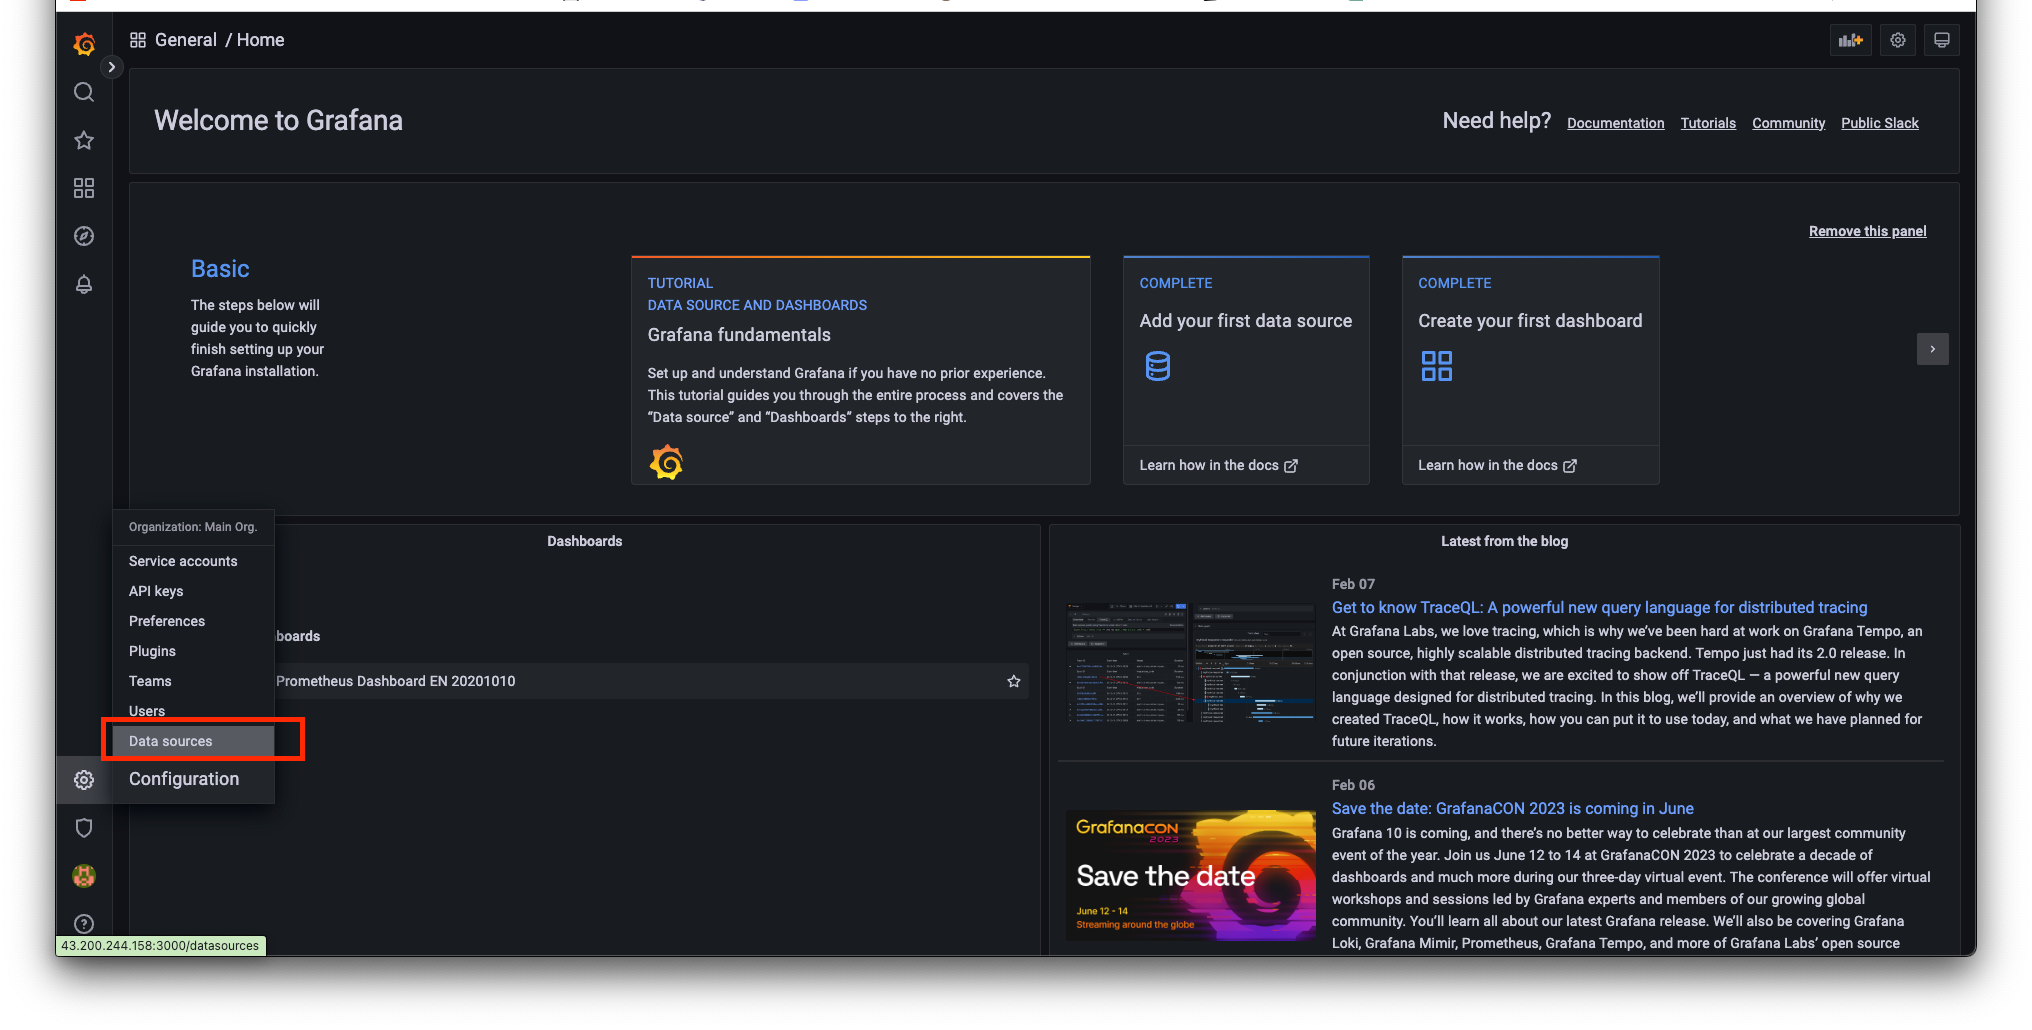
그라나파나에 접속해 data source 클릭
데이터 소스 추가를 클릭하고 프로메테우스 선택.
내가 사용하는 내부망 IP를 적고 포트에 9090을 입력
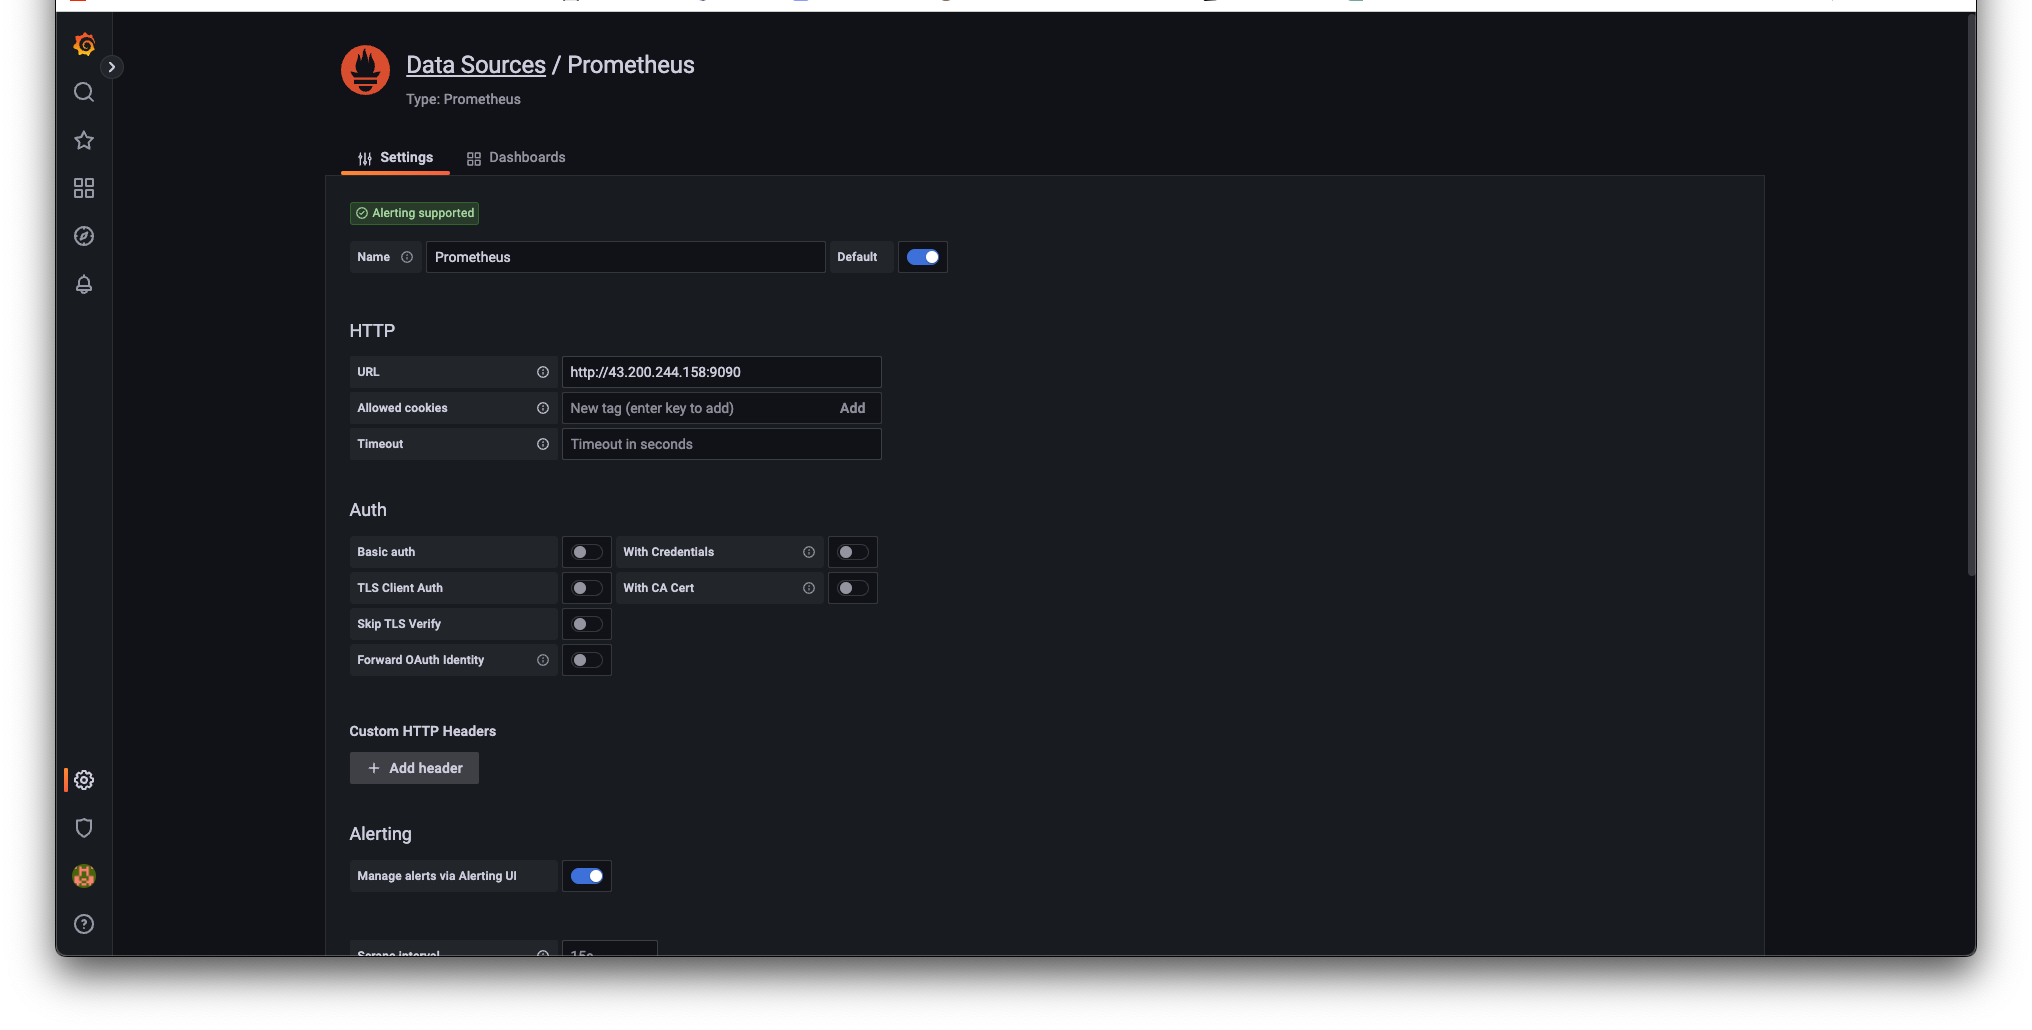
save&test를 눌러서 초록색 alert이 나오면 끝
'web' 카테고리의 다른 글
| 간단하게만 적용해보는 AWS ELB (0) | 2023.02.10 |
|---|---|
| 왜 클라이언트와 WAS 사이에 웹 서버를 두는 것일까 (리버스프록시 / 로드밸런싱) (0) | 2023.02.07 |
| [WIP 230113]멀티 스레드 (0) | 2023.01.13 |
- Total
- Today
- Yesterday
- 대규모더미데이터
- CheckedException
- jmeter로그인
- jmeter토큰
- 스프링faker
- index
- Spring
- jmeter세션
- jmeter부하테스트
- 항해
- 프로그래머스
- Java
- jwt
- Lock
- hackerrank
- Python
- jmeter테스트
- Redisson
- jmeter쿠키
- 토큰
- jmeter시나리오
- pessimisticlock
- CorrectnessAndTheLoopInvariant
- 자바
- 부하테스트시나리오
- bankersRounding
- 인덱스
- EC2
- 동적크롤링
- Redis
| 일 | 월 | 화 | 수 | 목 | 금 | 토 |
|---|---|---|---|---|---|---|
| 1 | 2 | 3 | ||||
| 4 | 5 | 6 | 7 | 8 | 9 | 10 |
| 11 | 12 | 13 | 14 | 15 | 16 | 17 |
| 18 | 19 | 20 | 21 | 22 | 23 | 24 |
| 25 | 26 | 27 | 28 | 29 | 30 | 31 |
